Table of Contents
- Why Low Voltage Landscape Lighting Is a Smart DIY Project
- Tools Needed for Landscape Lighting Installation
- Step 1: Plan Your Layout and Fixture Placement
- Step 2: Landscape Lighting Transformer Sizing and Mounting
- Step 3: Low Voltage Lighting Wire Gauge Guide and Cable Runs
- Step 4: Connect Fixtures and Bury the Cable
- Step 5: Test, Adjust, and Set Your Controls
- Common Mistakes and What to Skip
- Frequently Asked Questions
Last Updated: September 5, 2026
Why Low Voltage Landscape Lighting Is a Smart DIY Project
Low voltage landscape lighting is a practical upgrade that most homeowners can install over a weekend without an electrician. The system runs on 12 volts rather than standard line voltage, making the wiring safer to handle and easier to route through a yard.
The real advantage is flexibility. You can move fixtures, extend a run, or add path lights next season without rewiring your home. The components are modular, the transformers plug into a standard outdoor GFCI outlet, and the connections are designed for DIY assembly.
Below, we walk through the full process, from laying out your design to testing the finished system, including technical details most guides skip, such as voltage drop and wire gauge.
Tools Needed for Landscape Lighting Installation
Most of the tools needed are already in your garage: a shovel or trenching tool, wire strippers, a utility knife, and a screwdriver for the transformer terminals. A tape measure and landscape marking paint help you map the runs before you dig.
You will also need a few lighting-specific items. Fixture connectors, sometimes called pierce points, let you tap into the main cable without cutting it. Waterproof wire nuts or gel-filled caps protect the splices you do make. Finally, keep a multimeter handy to test voltage at the transformer and fixtures, it catches wiring mistakes before you bury everything.
Step 1: Plan Your Layout and Fixture Placement
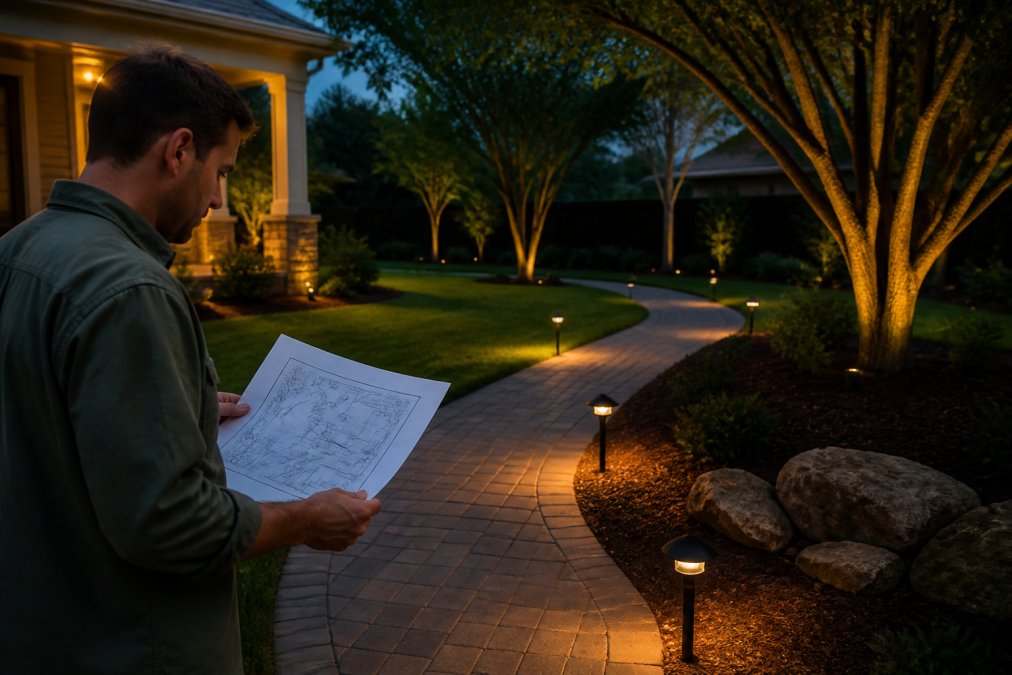
Start your project on paper, not in the yard. Walk your property at night and note which features deserve attention: a specimen tree, the front walk, architectural details, or a driveway edge. Mark the locations for path lights, spotlights, and uplights, then measure the distance from each fixture back to the transformer.
Path lights typically sit 6 to 8 feet apart so the pools of light overlap slightly. Spotlights and uplights are placed at the base of the object they illuminate, aimed upward to accent texture and height. Sketch this layout, then use it to calculate your total cable length, which drives both the transformer size and the wire gauge.
Step 2: Landscape Lighting Transformer Sizing and Mounting
Add up the wattage of every fixture you plan to install, then choose a transformer rated for at least 20 to 30 percent more than that total. This headroom protects the system when you add fixtures later and prevents the transformer from running hot.
Mount the transformer near a GFCI outlet, ideally on an exterior wall or a post, at least 12 inches off the ground to avoid flooding. Many modern units include a photocell and a timer to automate the schedule. If you want smart control, choose a transformer with Wi-Fi capability so you can adjust the lights from your phone or tie them into a home automation routine.
Step 3: Low Voltage Lighting Wire Gauge Guide and Cable Runs
The wire gauge guide comes down to two numbers: 12-gauge and 14-gauge. For runs under 100 feet with a modest fixture load, 14-gauge direct burial cable is sufficient. For longer runs or higher wattage, step up to 12-gauge wire.
The reason is voltage drop. As electricity travels through the cable, it loses voltage, and the fixtures at the far end will look dimmer than those near the transformer. A common approach is to keep total run length under 150 feet, and to use 12-gauge wire for anything over 100 feet. This is where many installations fail, so it is worth the extra cost of heavier cable. According to general low voltage wiring guidance from the National Electrical Code resources, accounting for conductor distance is essential for reliable outdoor lighting performance.
The Math Behind Voltage Drop
Most guides stop at “use 12-gauge for long runs,” but the real fix is a simple calculation. For a 12-volt system, keep voltage drop under 10% (1.2 volts) to prevent visible dimming (nec.org). The formula is:
Voltage Drop (V) = (2 × Cable Length (ft) × Current (Amps) × Wire Resistance (Ohms per ft)) / 1000
A 100-foot run of 14-gauge wire (about 2.5 ohms per 1000 feet) carrying 5 amps loses about 2.5 volts, well over the 1.2-volt target. The same run in 12-gauge wire (about 1.6 ohms per 1000 feet) loses 1.6 volts, still too much. Drop to a 50-foot run of 12-gauge at 5 amps, and the loss is just 0.8 volts, acceptable.
To find your current, divide the total wattage on the run by 12 volts. For example, 100 watts of fixtures draws about 8.3 amps. At that load, a 50-foot run of 12-gauge loses 1.3 volts, right at the edge. Keep individual runs short, or split the layout into multiple circuits from the transformer.
Wire Types and What to Buy
Look for direct burial cable rated for underground use, usually labeled “UF” (underground feeder) or specifically as landscape lighting wire. The conductors are typically stranded copper, which flexes easily and resists breakage from soil movement. Avoid standard indoor speaker wire or extension cord; neither is rated for moisture or UV exposure.
For most residential systems, 12-gauge and 14-gauge are the only sizes you need. If you have an exceptionally long run, over 150 feet, step up to 10-gauge wire, which has about 1.0 ohm per 1000 feet. It prevents the dim-tail problem. When you buy cable, check the jacket for a “direct burial” or “sunlight resistant” rating, and confirm it has two conductors (typically black and red) plus a ground wire if your transformer requires it.
A Smarter Way to Run Cable
Instead of one long daisy-chain from the transformer, consider a “hub and spoke” layout. Run a single 12-gauge trunk line from the transformer to a central point, then branch off with shorter 14-gauge runs to each fixture or small group. This cuts total wire length, reduces voltage drop, and makes future additions easier. It also isolates problems: if one branch fails, the rest of the system stays lit.
Before you buy wire, sketch your layout and measure each run. Add 10% to the total for slack and mistakes. Then run the voltage drop calculation for the longest run at your expected load. If the number comes out over 1.2 volts, upgrade the wire gauge or split the run.
Step 4: Connect Fixtures and Bury the Cable
Run the main cable from the transformer along your planned path, leaving slack at each fixture location. Dig a shallow trench, about 3 to 6 inches deep, along the route. This keeps the cable out of the way of routine digging and aerating.
At each fixture, use a pierce-point connector to tap into the main line. These connectors have prongs that pierce the cable insulation and make contact with the wire inside, requiring no stripping. For the connection to the fixture lead, follow the connector instructions to ensure a weatherproof seal. If you need to splice two cable lengths, use gel-filled wire nuts and bury the splice in a junction box rated for outdoor use.
Leave a small loop of slack at each fixture before you backfill the trench. This loop lets you lift the fixture for bulb changes or repositioning without pulling the connection apart. Tamp the soil down with a trowel as you go.
Step 5: Test, Adjust, and Set Your Controls
Before you finalize the installation, turn on the transformer and test every fixture. Walk the yard at dusk and check for three things: fixtures that do not light, fixtures that are noticeably dimmer than their neighbors, and beams that miss their intended target. Dim fixtures at the end of a run point to voltage drop.
Adjust the fixture heads to aim the light where you want it. Path lights should cast a soft pool on the walking surface, not glare into your eyes. Spotlights should graze the surface of a tree or wall to reveal texture. Once the angles look right, set the photocell or timer so the system turns on at dusk and off at a reasonable hour.
The Smart Home Upgrade Most Guides Skip
A basic photocell or mechanical timer gets the job done, but modern low voltage transformers offer a level of control that changes how you use your landscape lighting. Instead of a simple on/off schedule, you can set scenes, adjust brightness, and automate based on sunrise and sunset, all from your phone.
Look for a transformer with built-in Wi-Fi or Bluetooth, or one that works with a separate smart controller. Key features to compare:
- App-based scheduling: Set different times for weekdays versus weekends, or shift the schedule automatically as days get shorter in the fall.
- Scene control: Group fixtures into zones (path lights, uplights, accent lights) and turn them on independently. For example, keep path lights on all night for safety, but turn off uplights at 11 PM.
- Voice assistant integration: Many Wi-Fi transformers work with Amazon Alexa, Google Assistant, or Apple HomeKit, letting you say “turn on the backyard lights” without opening an app.
- Dimming capability: Not all transformers dim. If you want to lower brightness for a dinner party or raise it for a gathering, check that the unit supports dimming and that your fixtures are dimmable.
How to Sync with a Home Automation Hub
If you already use a smart home hub, like Samsung SmartThings or Hubitat, check whether the transformer manufacturer offers a native integration or a Matter/Thread-compatible model. Matter lets devices from different brands talk to each other without separate bridges. A Matter-certified transformer will appear in your hub’s device list automatically, and you can include it in routines alongside your indoor lights, locks, and cameras.
For a simpler setup, many Wi-Fi transformers use their own app and do not need a hub. The trade-off is that you manage them separately from your other smart devices. If you want everything in one place, prioritize a transformer that supports the same ecosystem as your existing gear.
Testing the Smart Features
Once the transformer is connected to your Wi-Fi, test the app controls before you bury the cable. Turn each zone on and off, confirm the schedule triggers at the right time, and check that the photocell overrides the schedule when you want manual control. A common issue is Wi-Fi signal strength at the transformer location, you may need a Wi-Fi extender or a transformer with a wired Ethernet port.
Do not rely on the app alone for safety lighting. Set a backup schedule on the transformer’s built-in timer or photocell so the lights still come on if your Wi-Fi drops or the app loses connection. A smart system is convenient, but a dumb timer is more reliable in a power outage.
Final Walkthrough
After you have tested the fixtures and configured the controls, do one last walk at night. Look for hot spots, glare, or dark gaps between fixtures. Adjust the beam angles and, if needed, swap out bulbs for a warmer color temperature, most landscape pros prefer 2700K to 3000K for a soft, inviting glow rather than the harsh blue-white of 5000K. Once everything looks right, backfill the trenches and enjoy the result.
Common Mistakes and What to Skip
The most common mistake is undersizing the transformer. Homeowners add fixtures over time, and a transformer running at full capacity will fail prematurely. Buy the larger unit from the start, since the price difference is small compared to the cost of replacing it later.
Another frequent error is burying the cable without checking the connections first. Test the system while the trench is still open. Finding a bad connection after you have tamped the soil means digging it up again. Also, do not mix fixture types on a single long run without accounting for the load.
Finally, skip the cheap timer that plugs into the outlet. It will fail within a season or two. Invest in a transformer with a built-in photocell and timer, or a smart unit that integrates with your home system. For larger properties or commercial spaces, the complexity grows quickly. If your layout involves long cable runs, multiple transformers, or intricate design work, consider a professional installation. Houston Light handles projects of every scale, from modest residential front yards to large commercial properties, with insured labor and a lifetime warranty on all installed lighting. The company also offers Holiday Decorating and HOA Holiday Lighting services, which can extend the same professional touch to seasonal displays. The U.S. Department of Energy guidance on outdoor lighting efficiency notes that well-designed outdoor lighting also reduces energy waste, which matters when you light a large area all season.
Frequently Asked Questions
Do you need an electrician to install low-voltage lighting?
No, you generally don’t need an electrician for low voltage landscape lighting. The system runs on 12 volts from a transformer, which you plug into a standard GFCI outdoor outlet. This makes the electrical connections safer and simpler to handle. The main exception is if you lack a nearby outdoor outlet. In that case, you’ll need an electrician to install one. Always check your local code, as some areas have specific requirements for burying cable and mounting transformers.
How do you calculate the transformer size needed for landscape lighting?
Add up the total wattage of every light fixture you plan to install. For example, ten 5-watt path lights equal 50 watts. Then, multiply that total by 1.25 to build in a safety buffer. This means a 50-watt load needs a transformer rated for at least 62.5 watts. The closest standard sizes are 60, 100, 150, and 300 watts. Choosing a larger transformer also gives you room to add more fixtures later without buying a new unit.
How deep should low-voltage landscape lighting wire be buried?
Low-voltage landscape lighting cable should be buried at least 6 inches deep. This protects it from accidental damage from aerating, edging, or other routine yard work. Use a flat shovel or a specialized trenching tool to cut a clean slot in the sod. After laying the cable, tuck it into the slot and firm the soil back down with your foot. For extra safety in areas you dig often, you can run the cable through PVC conduit for added protection.
Can you plug low-voltage lights into a regular outdoor outlet?
Yes, you can plug a low voltage landscape lighting transformer into a standard outdoor outlet, but the outlet must be a GFCI (Ground Fault Circuit Interrupter) type. This is a key safety requirement. The transformer converts the 120-volt household current down to a safe 12 volts, which is what powers the landscape lights. Make sure the outlet is weatherproof and has a cover that protects the plug from rain and moisture. Also, keep the transformer plugged in vertically to allow water to drain from the cord connection.
Installing low voltage landscape lighting is a satisfying project that transforms how your property looks after dark. The key is to plan the layout, size the transformer correctly, and choose the right wire gauge for your run lengths. If the project grows beyond a weekend DIY job, Houston Light provides professional design and installation with weather-resistant LED technology, insured labor, and a lifetime warranty. Get a free estimate and let our team handle the rest.