Table of Contents
- What You’ll Need for LED Lighting Installation
- Measuring and Planning Your LED Lighting Installation
- Surface Preparation and Mounting
- Installing LED Strips and Connecting Power Supplies
- Wiring, Soldering, and Electrical Safety for Outdoor LED Lighting
- Professional Holiday Lighting Installation Services and Maintenance
- Long-Term Care: Professional Lighting Maintenance Packages
- Common Installation Mistakes to Avoid
- Frequently Asked Questions
Last Updated: September 27, 2026
What You’ll Need for LED Lighting Installation
Before you start your LED lighting installation, gather the right tools and materials. You’ll need an LED power supply unit, LED driver, LED strip lights, solderless connectors or a soldering iron with solder, mounting clips, and an installation surface free of debris. A cutting tool helps you trim strips to size. Isopropyl alcohol cleans the mounting surface. Heat shrink tubing protects connections. For outdoor installations, choose waterproof LED strips with a high IP rating to handle weather exposure.
Most homeowners underestimate how much prep work matters. A clean, dry surface determines whether your lights stay put for years or peel away in months. Take time to gather everything before you begin. This prevents mid-project trips to the hardware store and keeps your workflow smooth.
Check your power supply wattage before installation. An undersized power supply causes flickering and shortens LED lifespan. Match the supply to your total LED wattage, then add 20% overhead for safety.
Measuring and Planning Your LED Lighting Installation
Measure twice, cut once. Start by mapping out exactly where you want your LED lighting installation to run. Use a measuring tape to determine total length. Note any corners, obstacles, or transitions. Sketch a simple diagram showing power supply placement, driver location, and connection points.
Understanding Voltage Drop in Long Runs
Voltage drop is the single most overlooked cause of LED dimming and premature failure in residential installations. When current travels through wire over a long distance, resistance causes the voltage to decrease by the time it reaches the far end of your LED strip. This manifests as visible dimming, color shifting, or inconsistent brightness across your installation.
For any run exceeding 30 feet, voltage drop becomes a practical problem. Here’s why it matters: a 12V LED strip at the power supply may only receive 10V or 9V at the far end, causing the LEDs to dim noticeably. The longer the run and the thinner the wire gauge, the worse the effect.
Calculate voltage drop using this principle: voltage drop increases with distance and current draw, and decreases with thicker wire. For runs between 30 and 50 feet, run power to the midpoint of your installation rather than from one end. This cuts the effective distance in half and eliminates dimming. For runs exceeding 50 feet, use two separate power supplies, one feeding each half of the installation. This is far more reliable than trying to compensate with a larger power supply.
Test brightness at the far end before finalizing your installation. If you notice dimming compared to the near end, stop and reposition your power supply or add a second one. Fixing voltage drop after installation is complete requires rewiring, so address it during the planning phase.
Planning Your Cutting Points and Layout
Plan your cutting points before you start. Most LED strips have designated cut marks every few inches. Cut only at these marks to avoid damaging the circuit. Measure from your starting point to each cut location. Mark the strip with a pencil before cutting.
Consider color temperature and lumens for your space. Warmer color temperatures (2700K-3000K) create cozy lighting ideal for holiday displays. Cooler temperatures (5000K-6500K) look more professional and bright. Lumens measure brightness output. Outdoor areas typically need 50-100 lumens per square foot depending on ambient light and desired effect.
If your installation includes multiple strips or segments, plan how each will connect to the power supply. Daisy-chaining (connecting strips end-to-end) works for short runs under 30 feet. For longer installations, plan separate circuits from the start to avoid voltage drop problems.
Surface Preparation and Mounting
Clean your mounting surface thoroughly with isopropyl alcohol. Dust, dirt, and moisture prevent adhesive backing from bonding properly. Wipe the entire area where strips will attach. Let it dry completely before proceeding.
For aluminum mounting channels, ensure they’re clean and dry. Channels protect LED strips from weather and distribute heat away from the lights. Position channels where you want your LED lighting installation to run. Secure channels with mounting clips or brackets rated for outdoor use.
If you’re not using channels, apply the adhesive-backed strips directly to clean, dry surfaces. Peel back a small section of the adhesive backing. Press the strip firmly into place. Work in sections, pressing as you go. Avoid stretching the strip during application.
Never install LED strips on wet or damp surfaces. Moisture breaks the adhesive bond and causes electrical hazards. Wait until the surface is completely dry, even if it takes extra time.
Installing LED Strips and Connecting Power Supplies
Start at one end of your prepared surface. Peel back the adhesive backing slowly and press the LED strip firmly into place. Apply steady pressure along the entire length. Work in sections to avoid wrinkles or bubbles.
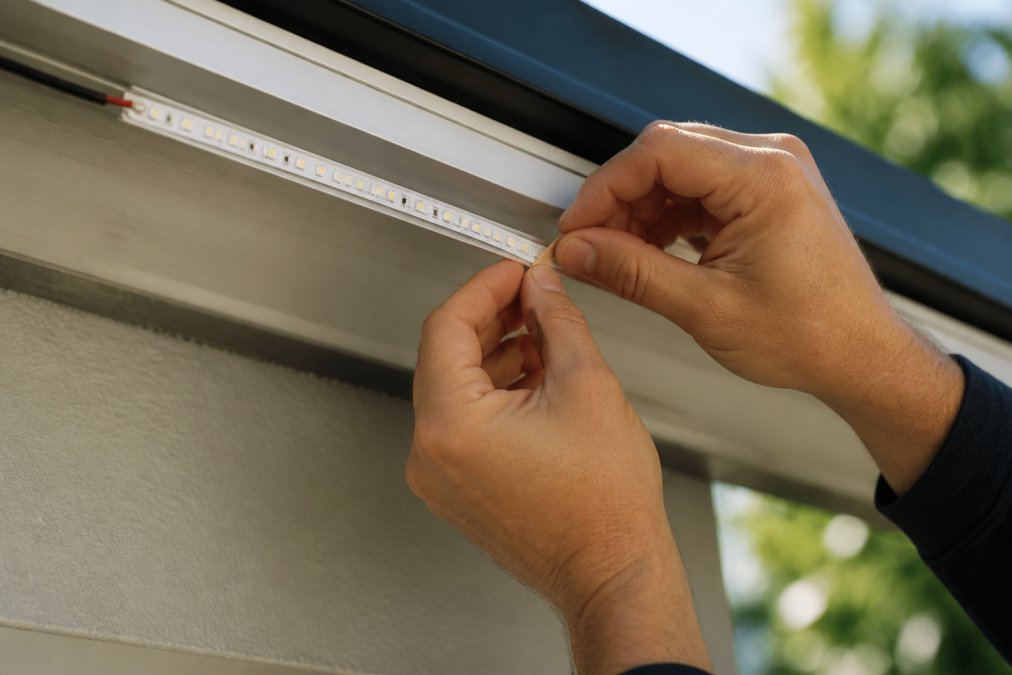
Once your LED lighting installation strips are mounted, connect the power supply unit. Most LED systems use a simple connector that plugs into the strip. Some require soldering. Solderless connectors are faster and safer for beginners. Push the connector firmly onto the strip contacts until it clicks into place.
Position your power supply in a dry, protected location. Outdoor power supplies need weatherproof enclosures. Keep the supply away from water sources and direct sunlight. Leave enough cable length to reach your power outlet safely.
Connect the power supply to your LED driver if your system uses one. The driver regulates power flow to the strips. Match the polarity correctly. Red wires connect to positive terminals. Black wires connect to negative terminals. Reversed polarity damages your LEDs.
Wiring, Soldering, and Electrical Safety for Outdoor LED Lighting
For longer installations, you may need to solder connections between strips or extend wiring. Use a soldering iron heated to 350-400°F. Apply solder to the joint, not the iron. A good solder joint looks shiny and smooth, not dull or blobby. Allow joints to cool naturally before handling.
Heat shrink tubing protects soldered connections from moisture and corrosion. Slide tubing over the joint before soldering. After soldering, carefully heat the tubing with a heat gun until it shrinks tight around the connection. This prevents water infiltration, which is the leading cause of connection failure in outdoor installations.
Thermal Management and Heat Dissipation
One of the most underestimated factors in LED longevity is heat management. LEDs produce less heat than incandescent bulbs, but they are sensitive to it. Excessive heat shortens LED lifespan dramatically, every 10°C increase in operating temperature can cut lifespan in half.
Aluminum mounting channels are not just for aesthetics or protection; they serve as heat sinks. Aluminum conducts heat away from the LED strip and dissipates it into the surrounding air. For high-density LED strips (more than 60 LEDs per meter) or installations in warm climates, always use aluminum channels. Direct adhesive mounting on plastic or wood surfaces traps heat against the LEDs, causing premature failure.
Position aluminum channels so air can circulate around them. Avoid mounting channels in enclosed spaces or against surfaces that block airflow. If you must install in a confined area, consider using a thinner strip with lower power density, or space multiple channels to allow heat dissipation.
For outdoor installations in direct sunlight, position power supplies and drivers in shaded locations or protective enclosures. Direct sunlight on these components causes internal temperatures to rise 20-30°F above ambient, shortening their lifespan. Weatherproof enclosures designed for electrical components provide both protection and ventilation.
Electrical Code Compliance and Safety
Outdoor LED lighting safety standards require proper grounding and weatherproofing. Use outdoor-rated wire and connectors designed for wet environments. All outdoor wiring should be rated for wet locations (marked with a “W” designation).
Check your local electrical codes before installation. Some jurisdictions require licensed electricians for hardwired systems that connect to permanent power. The National Electrical Code (NEC) governs electrical installations in most areas. For temporary holiday lighting installations using plug-in power supplies, code requirements are typically minimal. For permanent installations or those hardwired to your home’s electrical panel, code compliance is mandatory.
Daisy chaining allows you to connect multiple strips to a single power supply. Each strip connects to the next in sequence. This works well for runs under 30 feet.
Voltage drop and heat buildup are the two biggest causes of LED dimming, color shifting, and premature failure in longer installations. Test brightness at the far end before finalizing connections. If dimming is visible, add a second power supply rather than trying to fix it later. Use aluminum channels for any high-density strips to ensure proper heat dissipation.
Professional Holiday Lighting Installation Services and Maintenance
Many homeowners discover that professional installation saves time and prevents costly mistakes. Houston Light’s holiday decorating services bring 15 years of experience in outdoor LED lighting safety standards and proper installation technique. Our team handles everything from measuring and planning through final testing and programming.
Long-Term Care: Professional Lighting Maintenance Packages
Your LED lighting installation needs regular maintenance to perform at peak brightness. Dust accumulates on diffusers and reduces light output. Connections loosen from temperature cycling and vibration. Moisture creeps into poorly sealed joints.
Common Installation Mistakes to Avoid
Don’t skip surface preparation. Rushing this step causes strips to peel away within weeks. Spend the time to clean and dry thoroughly. Your installation will last years longer.
Frequently Asked Questions
What’s the difference between soldering and solderless connectors for LED lighting installation?
Solderless connectors offer faster assembly and require no special tools, making them ideal for beginners. Soldering creates a more durable, permanent connection that resists vibration and moisture better over time. For outdoor LED lighting installation in weather-exposed areas, soldering is often preferred by professionals because it eliminates connection points where corrosion can develop. Choose based on your comfort level and the permanence you need.
How do I know if my LED strips need an aluminum mounting channel?
Aluminum channels protect LED strips from physical damage, improve heat dissipation, and provide a professional appearance. They’re essential for outdoor installations and anywhere strips might be touched or exposed to moisture. Indoor, low-traffic applications may work without channels if the adhesive backing is strong and the surface is clean. Channels also allow you to install diffusers, which soften the light and reduce glare. For any permanent installation, channels add durability and are worth the investment.
What safety standards apply to outdoor LED lighting installations?
Outdoor LED lighting must comply with the National Electrical Code (NEC), which governs wiring, grounding, and weatherproofing requirements. All outdoor fixtures should have an IP65 or higher rating to resist water and dust. Use outdoor-rated power supplies and wire, and ensure all connections are sealed against moisture. Ground metal mounting hardware and follow local building codes, which may require permits for permanent installations. Professional installers verify compliance to protect both the system and your property.