Table of Contents
- Choosing the Right Bulb Type and LED Technology
- Best Outdoor Christmas Light Clips and Hardware Installation
- LED Christmas Light Spacing Guide for Consistent Coverage
- Planning Your Layout: Measuring, Symmetry, and Focal Points
- How to Hide Christmas Light Wires and Manage Excess Cord
- Safety Precautions, Electrical Load, and Professional Installation
- Color Selection, Layering, and Creating Visual Depth
- Frequently Asked Questions
Last Updated: September 18, 2026
Choosing the Right Bulb Type and LED Technology
How to make your Christmas lights look professional starts with selecting the right bulbs. LED lights are the standard for professional installations, they’re energy-efficient, durable, and available in consistent color temperatures. Smart lighting technology elevates both appearance and functionality.
Traditional LED vs. Smart LED Bulbs
Traditional LED bulbs are reliable and affordable for straightforward designs. Smart LED bulbs integrate with controllers and apps to program color sequences, adjust brightness, and synchronize effects. Smart bulbs cost more upfront but enable dynamic displays that look intentional and sophisticated.
C9 bulbs are larger and ideal for rooflines; C7 bulbs are smaller and work better for detailed work and trees. Professional installers often combine both to achieve visual depth.
Color Temperature and Consistency
Warm white (2700K) creates a classic glow; cool white (5000K) produces a crisp, modern look. For a professional appearance, stick with consistent color throughout your display. This uniformity signals intentional design.
RGB bulbs allow seasonal color shifts and animated sequences but require a compatible smart controller. Invest in a quality controller with app support; budget options often have unreliable connectivity or limited color accuracy.
Smart Lighting Integration for Professional Control
Smart controllers connect to Wi-Fi and allow you to program sequences, adjust timing, and control color from your phone. This transforms a static display into a dynamic one that looks professionally managed.
Verify compatibility with your bulb type, check that the app is intuitive, and look for scheduling support, this allows automatic on/off without manual intervention.
LED Technology Durability
Modern LEDs produce minimal heat and last thousands of hours. Verify bulbs are rated for outdoor use and have IP65 or higher waterproof ratings to resist rain, snow, and humidity.
Buy slightly more bulbs than your layout requires. You’ll need spares for replacements during the season, and having matching stock ensures color consistency if a bulb fails mid-display. If using smart bulbs, purchase spares of the same model and firmware version to ensure compatibility with your controller.
Best Outdoor Christmas Light Clips and Hardware Installation
Quality clips hold bulbs securely without damaging gutters, rooflines, or siding.
Gutter hooks grip gutters firmly without puncturing them. Look for hooks with rubber padding and stainless steel or coated steel to resist rust.
Adhesive clips work on flat surfaces like fascia boards. Test them first to ensure they won’t damage your paint or siding.
Use weatherproof zip ties for secondary support; standard plastic ties become brittle in cold and fail mid-season.
Space C9 clips 12 inches apart and C7 clips 8 inches apart. This consistency creates the visual uniformity that distinguishes a professional installation.
Never use nails or screws to attach clips directly to gutters. This damages gutters, creates water leaks, and voids most gutter warranties. Gutter-safe clips distribute weight without puncturing.
LED Christmas Light Spacing Guide for Consistent Coverage
Maintain 12-inch spacing for C9 bulbs. If your roofline doesn’t divide evenly, adjust spacing slightly rather than bunching bulbs at one end.
Space C7 bulbs 8 inches apart for dense coverage or 12 inches apart for a lighter effect.
Spiral strands around tree trunks and branches in consistent loops from base upward to create depth.
Hide lead wires or run them along your roofline. Never leave them dangling or crossing your display.
The most professional displays use consistent spacing throughout. Viewers subconsciously register uniformity as intentional design, while spacing variations read as careless installation.
Planning Your Layout: Measuring, Symmetry, and Focal Points
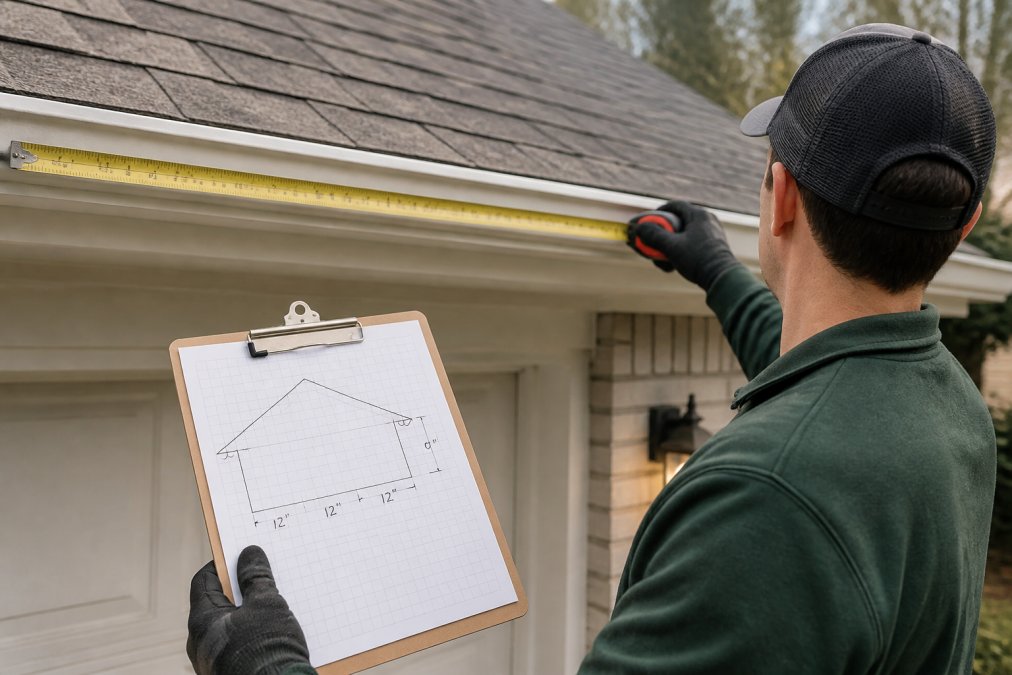
Measure your roofline and sketch a layout plan before purchasing lights to prevent overspending and identify problems early.
Use a tape measure or laser distance tool for accurate dimensions. Include peaks, valleys, corners, and architectural features. Write measurements down.
Use centered peaks or entryways as focal points and balance lighting on either side. Random asymmetry looks like a mistake.
Use brighter or denser lighting on focal points (arched entryways, prominent gables, front doors) and lighter coverage on secondary areas.
Design for visual impact at 30 feet. Roofline lighting reads from far away; ground-level details don’t.
How to Hide Christmas Light Wires and Manage Excess Cord
Run cords along the back of your home or along existing trim where they blend into shadows.
Secure excess lead wire with zip ties and tuck behind your roofline. Never leave coils hanging or draped.
Identify GFCI outlets and map cord routes before installation. Use outdoor-rated cords rated for your wattage; undersized cords create fire hazards.
Safety Precautions, Electrical Load, and Professional Installation
Calculating Electrical Load
LED C9 bulbs draw 0.5-0.7 watts; LED C7 bulbs draw 0.4-0.5 watts. Standard 15-amp circuits safely support 1,500 watts; 20-amp circuits support 2,000 watts.
Multiply bulb count by wattage per bulb, then add controller wattage. For example, 200 LED C9 bulbs at 0.6 watts equals 120 watts, well within a standard 15-amp circuit. Recalculate carefully if mixing incandescent and LED.
Exceeding circuit capacity creates fire hazards and trips breakers. Use a load calculator to verify before purchasing.
GFCI Protection and Outlet Strategy
All outdoor lighting must use GFCI-protected outlets. Verify by pressing the “Test” button, power should cut immediately. If not, have an electrician inspect before use.
Identify GFCI outlets before installation. If your home lacks outdoor GFCI outlets, hire a licensed electrician to install one.
Pre-Installation Inspection and Damage Assessment
Inspect cords, bulbs, and connectors for damage. Replace cracked bulbs, frayed insulation, corroded connectors, or loose sockets before installation.
Test a sample strand for 10 minutes. The cord should be warm but not hot; if uncomfortably hot, it’s undersized and should not be used.
Troubleshooting Common Mid-Season Failures
If a circuit trips or lights go out mid-season: (1) For a single dark bulb, twist counterclockwise and replace. If the strand still doesn’t light, clean socket contacts. (2) For an entire strand out, inspect the plug and first connector for moisture or corrosion; dry and retest. (3) If the breaker trips immediately, unplug all lights and test one strand at a time to identify the fault. (4) For flickering, check all connectors and reconnect firmly; if it persists, switch to a heavier-gauge cord.
Weather Protection and Connector Sealing
Use outdoor-rated extension cords. Apply dielectric grease to connector pins to prevent corrosion and mid-season failures.
When to Call a Professional
For roofwork, steep rooflines, or complex electrical routing, professional installation eliminates safety risks and ensures proper technique.
Never daisy-chain more than three extension cords together. This creates voltage drop and overheating risks. If you need longer reach, use a single heavier-gauge cord instead. Never use indoor extension cords outdoors; they lack weatherproofing and create fire hazards.
Color Selection, Layering, and Creating Visual Depth
Warm white creates elegance and works with any style. Cool white offers a modern alternative. Mixing both requires careful planning, using warm white as primary and cool white as accent.
Use multiple strands at different distances to create depth, roofline, gutter, and tree lighting create visual layers.
Avoid over-lighting. Restraint and intentionality look more professional than equal coverage everywhere.
Test color choices before full installation by hanging a sample section and viewing it from the street at night.
Making your Christmas lights look professional requires attention to technical details and intentional design. Each element, from bulb selection to cord management, contributes to the final appearance.
If you’re managing a large residential property, commercial space, or community area, professional installation ensures flawless execution. Houston Light brings 15 years of experience in creating elegant, weather-resistant holiday displays. Our team handles everything from custom design and precise installation to electrical safety. We offer free on-site consultations for commercial properties and provide a lifetime warranty on all installations, giving you confidence that your display will look professional season after season. Learn more about our holiday decorating services
Frequently Asked Questions
How do professional installers attach lights to rooflines?
Professionals use outdoor-rated light clips and gutter hooks designed to grip shingles, gutters, or fascia without damaging the roof. They space clips 12-18 inches apart depending on strand weight and bulb type, securing the lead wire first before attaching individual clips. This prevents sagging and ensures the strand follows the roofline’s contour. Quality clips distribute weight evenly and resist weather, which is why professionals avoid staples or nails that can trap moisture and cause corrosion.
What LED Christmas light spacing should I use for a professional look?
Standard spacing for C9 bulbs is 12 inches apart, while C7 bulbs work well at 6-8 inches. Consistency matters more than the exact distance. Measure your roofline or wall length, divide by the number of bulbs you want, and mark positions before installation. Uneven spacing creates a cluttered, amateur appearance. Professional installers also account for peak placement at corners and focal points, spacing lights symmetrically so peaks align visually rather than mathematically.
How do I hide Christmas light wires and extension cords?
Route the lead wire along the gutter or behind fascia before attaching clips. Use weatherproof conduit or cord covers for exposed runs down walls or along drainpipes. For extension cords running to outlets, use outdoor-rated GFCI outlets and tuck cords behind downspouts, along the foundation, or under landscaping. Zip ties secure wires to gutters without damaging them. Avoid running cords across walkways or driveways. Professional installers plan the electrical path during the layout phase, not after lights are installed.
What safety precautions should I take when installing Christmas lights on a roof?
Use a safety harness and secure ladder placement on level ground. Inspect the roof for loose shingles or hazards before climbing. Ensure all outdoor outlets are GFCI-protected and rated for wet locations. Calculate total wattage of all strands connected to one circuit, most household circuits handle 1,440 watts safely, so avoid overloading. Never install lights in rain or wet conditions. Turn off power at the breaker before connecting or disconnecting strands. If your roof is steep or your home is more than one story, hire a professional with liability insurance.