Table of Contents
- How Smart Home Christmas Light Automation Actually Works
- How to Set Up Holiday Lighting Schedules Step by Step
- Best Outdoor Smart Plugs for Holiday Lights
- Voice Control, Scenes, and Hub Integration
- Holiday Lighting Automation Safety Best Practices
- Choosing the Right Wireless Protocol for Your Display
- When to Call a Professional for Your Holiday Lighting Display
- Frequently Asked Questions
Last Updated: September 19, 2026
How Smart Home Christmas Light Automation Actually Works
Smart home Christmas light automation means controlling holiday lighting through connected plugs, controllers, and apps so displays turn on, dim, and shut off without touching a switch. We’ve watched homeowners move from manual timers to app-based schedules over the past decade. This guide covers hardware, scheduling, safety, and when professional installation beats DIY.
Smart Plugs vs. Smart Controllers: Which Setup Fits Your Display
A smart plug suits simple displays with a few strands on one or two outlets. A smart controller is better for larger displays with multiple zones, color changes, or synchronized effects. The choice comes down to how many separate light runs you need and whether you want per-zone control.
| Setup | Best For | Control Level | Setup Difficulty |
|---|---|---|---|
| Smart plug | 1-2 outlets, simple strands | On/off, basic dimming | Low |
| Smart controller | Multi-zone displays, color effects | Per-zone, full effects | Moderate |
How to Set Up Holiday Lighting Schedules Step by Step
Setting up a holiday lighting schedule takes about 20 minutes for a basic smart plug. Connect the plug to your network, add it to your app, and create a schedule with a sunset trigger and an off time.
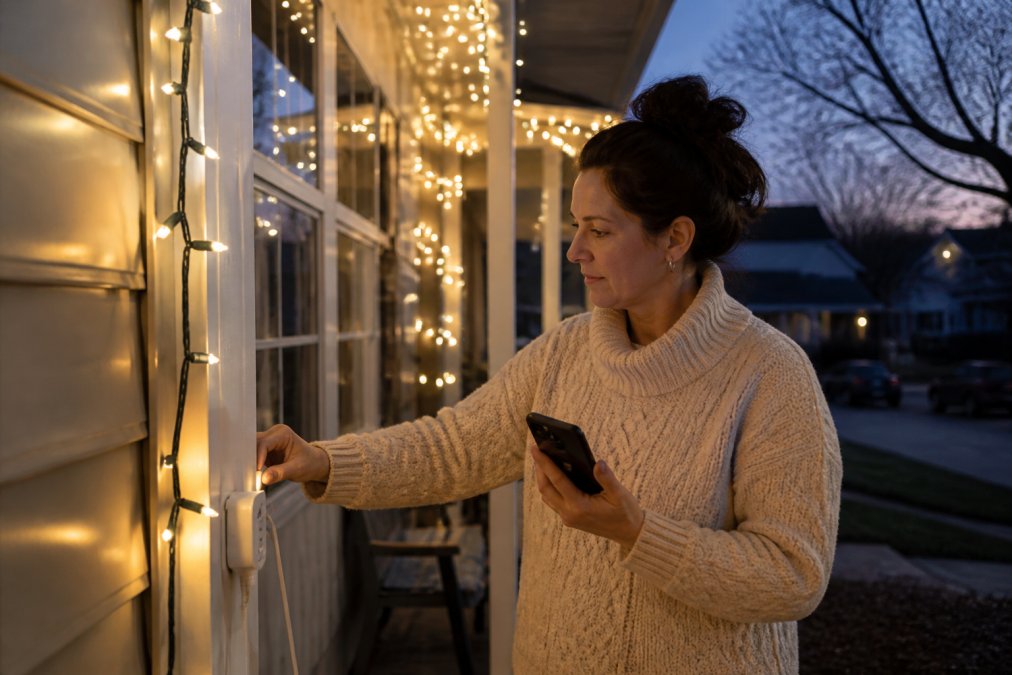
- Plug your smart plug into a GFCI-protected outdoor outlet and connect your lights to it.
- Download the manufacturer’s app and create an account.
- Put the plug in pairing mode and connect it to your 2.4 GHz Wi-Fi network.
- Name the plug something clear, like “Front Roofline.”
- Open the scheduling section and create a new automation.
- Set the trigger to “sunset” and the end time to 10:30 PM or whenever you want lights off.
- Add a second schedule for weekends if you want longer run times.
- Test the schedule manually before relying on it.
Sunset Triggers, Timers, and Geofencing
Sunset triggers are the most reliable option because they adjust automatically as days shorten. Timers work but need manual adjustment every few weeks. Geofencing turns lights on when you arrive home, nice for accent lighting, less useful for a full display on a fixed schedule. Integrating these automated schedules into your broader home security lighting strategy ensures that your property remains well-lit and protected throughout the entire winter season.
Best Outdoor Smart Plugs for Holiday Lights
The best outdoor smart plugs share four traits: a true outdoor IP rating, a grounded three-prong outlet, a physical override button, and a wireless protocol that reaches your display without dropping. Most failures blamed on the app are actually hardware or placement problems, so choose carefully before the season.
What the IP Rating Actually Means
The IP (Ingress Protection) rating is two digits: the first for solids, the second for liquids. IP64 means dust-tight and protected against splashing water from any direction; IP65 adds low-pressure water jets. IP44, common on indoor/outdoor plugs, only resists splashing and won’t survive a season of rain and freeze-thaw cycles.
Real-World Specs to Compare
Compare models on these specs, not marketing copy:
- IP rating: IP64 minimum for exposed locations; IP65 if the plug faces direct rain.
- Outlet configuration: Grounded three-prong. Two-outlet models let you run separate strands on different schedules from one device.
- Wireless protocol: Wi-Fi (2.4 GHz only on most models), Zigbee, Z-Wave, or Bluetooth. Match this to your existing hub or router before buying.
- Power rating: Most outdoor smart plugs are rated for 15 amps / 1,800 watts on a 120-volt circuit. Add up the wattage of every strand on the plug and stay well under that ceiling.
- Power monitoring: Useful if you want to see how much energy your display draws, but not essential for on/off scheduling.
- Physical override: A button on the plug body so you can turn lights on manually if the app or network is down.
- Operating temperature: Check the low-end rating. Many consumer plugs are rated to 14°F or 32°F; cheaper units can fail in a hard freeze.
How to Weatherproof the Connection
Even an IP65 plug can fail if the cord connection is exposed. Homeowners who run outdoor displays year after year typically:
- Mount the plug vertically, outlet facing down, inside a weatherproof box or under an eave.
- Use a short outdoor-rated extension cord to reach the first strand, and keep the plug-to-cord joint off the ground.
- Wrap the joint with self-fusing silicone tape (not standard electrical tape, which stiffens and peels in cold).
- Drip-loop the cord so any water that runs down the cord falls off before reaching the connection.
- Bring the plug inside or into a sealed box when the season ends.
Plugging holiday lights into an indoor-rated smart plug and leaving it outside is one of the most common causes of mid-season failures. Water gets in, the plug shorts, and your display goes dark. Always check the IP rating before buying, and never assume a plug is outdoor-safe just because the box shows a snowy house on the front.
When a Smart Controller Beats a Smart Plug Outdoors
If your display has more than two zones, or you want per-zone color and effects, a smart controller is the better outdoor choice. Controllers live in one weatherproof enclosure and drive multiple outputs, meaning fewer exposed connections and fewer failure points. The trade-off: they usually need a low-voltage power supply and a hub or app supporting their lighting protocol, so check compatibility first.
Buy one spare outdoor smart plug and keep it indoors. If a plug fails in a January storm, you can swap it in minutes instead of waiting on a replacement shipment while your display sits dark.
A Note on Extension Cords and Load
Outdoor extension cords are sized by wire gauge (AWG). A 16-gauge cord handles short runs and light loads; 14- or 12-gauge handles longer runs and heavier loads with less voltage drop. Low voltage makes LED strands flicker or fail to light fully, so if your run exceeds 50 feet, step up to a heavier gauge. Never coil a cord tightly while it carries current, heat builds inside and can damage the insulation.
Voice Control, Scenes, and Hub Integration
Voice control through Alexa, Google Assistant, or Siri turns your display on or off without opening an app. Scenes go further: a “Holiday Evening” scene can turn on the roofline, dim the porch lights, and start the yard display with one command. Hub integration ties it all together if you already run a smart home system.
Create a separate scene for each display mode you actually use. Most people need three: full display, roofline only, and off. Naming them clearly saves fumbling with the app when guests arrive.
Holiday Lighting Automation Safety Best Practices
Holiday lighting automation safety comes down to three things: outdoor-rated hardware, GFCI protection, and not overloading circuits. Follow these practices and electrical risk drops sharply.
- Use only outdoor-rated smart plugs and controllers
- Plug everything into GFCI-protected outlets
- Check the total wattage of your strands against the plug’s rating
- Keep connections off the ground and out of standing water
- Inspect cords for damage before the season starts
- Don’t daisy-chain more strands than the manufacturer allows
- Update firmware on your smart devices when prompted
Choosing the Right Wireless Protocol for Your Display
Most guides say Wi-Fi is easiest and Zigbee or Z-Wave is more reliable, then stop. That’s not enough: the protocol that works for one strand on the porch isn’t the one that works for a multi-zone display across a large yard. Here’s how each behaves outdoors, and how to pick one that won’t drop offline in a January cold snap.
The Four Protocols, Compared by Behavior
Wi-Fi (2.4 GHz). No hub required, the plug talks directly to your router. Range is the limit: 2.4 GHz passes through walls but weakens with distance and obstructions like brick, stucco, metal siding, and dense foliage. Most consumer Wi-Fi plugs hold a stable connection within roughly 40 to 50 feet through one or two interior walls; beyond that, drops become common.
How to Match Protocol to Display Size
A simple way to decide:
- One or two strands on a porch or front yard, router within 40 feet: Wi-Fi is fine. Choose a plug that supports 2.4 GHz (most do not support 5 GHz, and a 5 GHz-only network will not connect).
- Three to six zones across a front yard, router inside the house: Zigbee or Z-Wave with a hub. The mesh handles the distance and the obstructions better than a single Wi-Fi plug.
- Large property, multiple outbuildings, or heavy foliage between the router and the display: Z-Wave, because the sub-1 GHz signal penetrates better. Add a Z-Wave plug or repeater near the display to strengthen the mesh.
- Rental, temporary setup, or you do not want a hub: Wi-Fi, but plan to add a mesh Wi-Fi node near the display if the signal is weak.
Fixing Drops Without Replacing Hardware
If a plug keeps going offline, the fix is usually placement, not a new protocol:
- Move the plug closer to the router or hub. Even a few feet can matter through a wall.
- Add a mesh node or repeater. A Wi-Fi mesh node in a garage or front room often solves outdoor Wi-Fi drops. A Zigbee or Z-Wave plug placed between the hub and the display extends the mesh.
- Change the Wi-Fi channel. If your 2.4 GHz band is crowded, switching channels in the router settings can reduce interference.
- Check the 2.4 GHz vs. 5 GHz split. Many routers broadcast both under one name. If your plug only supports 2.4 GHz, temporarily split the bands or use a guest network set to 2.4 GHz only.
- Update firmware. Manufacturers sometimes ship fixes for connection stability.
For a single-outlet front-yard display, Wi-Fi is fine. For multi-zone displays across a large property, a hub-based protocol like Zigbee or Z-Wave will be more reliable through the season, and Z-Wave’s sub-1 GHz signal is the better bet when walls, foliage, or distance are working against you.
A Note on Hubs and Compatibility
If you already run a hub, SmartThings, Hubitat, Home Assistant, or a manufacturer bridge, check that your holiday plugs are compatible before buying. A Zigbee plug won’t join a Z-Wave-only hub, and some budget Wi-Fi plugs only work with their own app. Buying within one ecosystem is usually simpler than mixing protocols, even if a mixed setup can work with the right bridge.
When to Call a Professional for Your Holiday Lighting Display
Professional installation makes sense when your display involves rooflines, tall trees, commercial property, or a ladder above one story. It also makes sense if you want a design that looks intentional rather than assembled, or you’d rather not spend a weekend on a ladder in cold weather.
Frequently Asked Questions
What is the best way to automate outdoor Christmas lights?
The simplest approach is a weather-rated smart plug paired with a sunset trigger, so lights turn on automatically at dusk and off at a set time. For larger displays with multiple zones, a smart controller or low-voltage LED controller gives you independent control over each section. Whichever route you choose, confirm the device carries an IP rating suitable for outdoor use and plug it into a GFCI-protected outlet.
Do I need special smart plugs for outdoor Christmas lights?
Yes. Indoor smart plugs are not built for rain, snow, or temperature swings. Look for an outdoor rated plug with an IP rating of at least IP44, a grounded three-prong design, and a housing that seals around the cord. Also check the plug’s wattage limit against your total light load, since a single strand of incandescent bulbs draws far more power than an equivalent LED strand.
How can I set up a schedule for my holiday lighting display?
Open your smart plug or hub app, create an automation routine, and set a sunset trigger as the start time. Add an end time, typically between 10 and 11 p.m., so the display does not run all night. If your app supports geofencing, you can also have lights turn on only when someone is home. Save the routine and test it for a few evenings before the holiday season ramps up.
What are the safety requirements for outdoor smart lighting setups?
Plug outdoor devices into GFCI-protected outlets, keep connections off the ground and away from standing water, and use only cords and plugs rated for exterior use. Check that your total wattage stays under the smart plug’s limit, inspect strands for frayed wiring before hanging, and avoid daisy-chaining multiple extension cords. If your display includes roofline or tall-tree lighting, hire insured labor rather than working at height yourself.
The gap between a display that runs itself and one you’re constantly adjusting comes down to planning. Houston Light can design and install a system that handles scheduling, weatherproofing, and maintenance for you, with custom wreaths and garland to match. Get started with Houston Light and enjoy a holiday season where your lights simply work.