Table of Contents
- 1. Plan Your Design and Layout Before You Buy a Single Strand
- 2. Professional Holiday Lighting Installation Starts With the Right Hardware
- 3. Calculate Power Load Before You Plug In Anything
- 4. Holiday Lighting Safety Standards Every Large Display Must Meet
- 5. LED Holiday Lighting Efficiency Saves Money and Expands What You Can Build
- Smart Automation and Weatherproofing: The Details That Separate Pro Displays From Amateur Ones
- Conclusion: Bring It All Together for a Display That Lasts
- Frequently Asked Questions
Last Updated: September 14, 2026
1. Plan Your Design and Layout Before You Buy a Single Strand
Most homeowners start with a shopping cart. They should start with a tape measure and a design sketch. Large home holiday lighting succeeds or fails on paper long before the first clip touches a gutter, and the homeowners who skip this step end up with dead zones, overloaded runs, and a roofline that looks patchy from the street.
Here’s the fix: design the display in three layers, then measure every run.
Design in Three Layers, Not One
A large facade needs depth. A single line of lights along the roofline reads flat from the curb, no matter how many bulbs are on it. Professional displays layer:
- Layer 1, Architectural outline: the roofline, gables, and entry columns. This is the skeleton of the display and the first thing the eye reads.
- Layer 2, Feature accents: wreaths on windows, garland on railings, lit topiaries flanking the door. These draw the eye to specific points and break up long runs of roofline.
- Layer 3, Ground and landscape: walkway edges, tree wraps, and yard pieces. This anchors the display and gives it a base so it doesn’t float.
Skip any layer and the display looks unfinished. Add all three and even a modest strand count reads as a designed display rather than a decorated house.
Map Your Focal Points and Measure Every Run
Your focal points are the features that carry the display: the front gable, the entry columns, the two-story portico, the big oak by the driveway. Light those first, then fill in between them. A display with three strong focal points reads better from the curb than one with even coverage and no hierarchy.
Then measure. Write down the actual linear feet for every run: roofline, gutters, railing, tree trunks, walkway edges. Add 10 percent for sag, corners, and mistakes. A 40-foot roofline typically needs about 44 feet of strand once you account for the rise and fall over gables.
Measure at the attachment point, not the ground. On a two-story home, the difference between a ground measurement and the actual gutter line can be several feet per run, and that error compounds across the whole house.
Pick a Color Temperature and Stay Consistent
This is the single most common mistake on large homes. Warm white (around 2700K) reads traditional and elegant against brick and stone. Cool white (around 5000K) reads crisp and modern against stucco and glass. Pick one and stay consistent across the entire property, roofline, wreaths, garland, and yard pieces.
Mixing warm and cool white across a large facade is the fastest way to make an expensive display look cheap. If you want variety, vary the intensity or the fixture type, not the color temperature. Multicolor displays are a separate aesthetic choice and should be consistent too, don’t mix multicolor strands with warm white on the same roofline.
Match the Light Type to the Run
C9 bulbs are the workhorse for rooflines and gables, larger, brighter, and readable from the street. Mini lights are better for tree wraps, walkway edges, and detail work where a C9 would overwhelm the scale. Using C9 everywhere makes a large home look heavy; using mini everywhere makes it look thin. The right answer is usually both, assigned by layer.
That measurement list and layer plan become your shopping list, your power plan, and your installation map. It also tells you whether you’re looking at a weekend project or a job that needs a crew.
2. Professional Holiday Lighting Installation Starts With the Right Hardware
The single biggest gap between a store-bought kit and a professional holiday lighting installation is the hardware. Consumer clips crack in cold weather, cheap extension cords overheat, and bare staples pierce insulation. Commercial-grade clips, cords, and fasteners cost more up front and last for years.
Roofline Clips, Gutter Hooks, and Other Installation Tools That Protect Your Home
The right attachment method depends on what you’re clipping to:
- Roofline clips: Snap onto shingles or fascia without nails or adhesive. Use them for C9 strands along the front gable.
- Gutter hooks: Hang strands below the gutter line so water still drains. Best for single-story runs and porch edges.
- Magnetic clips: Work on steel gutters and metal fascia. Skip them on aluminum.
- Ground stakes: Hold walkway and yard strands off the grass and out of the mower’s path.
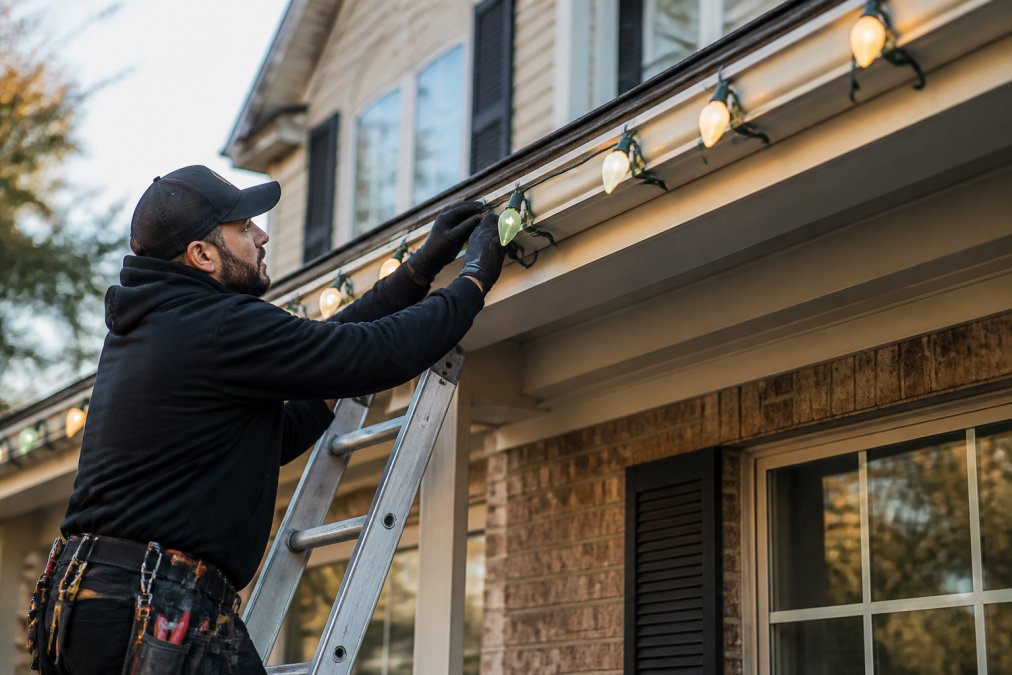
What most guides miss is the fastener itself. A clip that holds in October may let go in a January windstorm. Look for clips rated for cold-weather flexibility, and never use staples or nails on a shingle roof. Every hole you punch is a future leak.
3. Calculate Power Load Before You Plug In Anything
Power load is the total wattage your display draws, and it’s the number that decides how many strands can share a circuit. Exceed it and you trip breakers at best, overheat cords at worst. Most guides stop at “don’t overload your outlets.” For a large home, you need to do the math zone by zone before a single clip goes up.
The Basic Formula
Watts = volts × amps. A standard household circuit runs 120 volts and typically carries 15 amps, which is 1,800 watts. Keep your continuous load at 80 percent of that, about 1,440 watts, to leave a safety margin for startup surge and cold-weather resistance changes.
Now check your strands. LED string lights draw far less than incandescent. A typical 25-foot C9 LED strand might pull 5 to 10 watts, while the same length in incandescent can pull 100 watts or more. That difference is why a large display that would have needed three dedicated circuits a decade ago now runs on one.
Build a Zone-by-Zone Load Map
Don’t calculate the whole house as one number. Break the display into zones that match how you’ll actually plug things in, front roofline, portico, walkway, tree wraps, yard accents, and total each zone separately. Then assign each zone to a circuit.
A common pattern for a large home:
- Zone 1, Front roofline (C9 LED, 60 ft): roughly 20-30 watts. Runs on the same circuit as the portico.
- Zone 2, Two-story portico (C9 LED, 40 ft): roughly 15-20 watts. Shares with Zone 1.
- Zone 3, Walkway and yard (mini LED, 150 ft): roughly 15-25 watts. Can share with Zones 1 and 2 on a single 15-amp circuit with room to spare.
- Zone 4, Tree wraps (3 trunks, 150 ft): roughly 20-30 watts. Often best on its own exterior outlet so a fault in the yard doesn’t kill the roofline.
Add the zones up. If the total stays under 1,440 watts, you can run the whole display on one circuit. If it doesn’t, split zones across separate exterior outlets, not separate extension cords plugged into the same outlet, which changes nothing.
Why This Matters More on a Large Home
The failure mode isn’t usually the lights. It’s the extension cord. A 16-gauge cord running 100 feet to a far corner of the yard drops voltage, heats up, and becomes the weak link in an otherwise fine load plan. Use 14-gauge or 12-gauge cords for long runs, keep them as short as practical, and never coil excess cord tightly under a bush, heat has nowhere to go.
Daisy-chaining more than the manufacturer’s stated maximum is the most common cause of melted plugs and holiday fires. If a strand says “connect up to 3,” stop at 3. The fuse is a backup, not a license. And never replace a blown fuse with a higher-amperage one, that defeats the entire safety design.
A Quick Sanity Check Before You Plug In
Before the first strand goes live, walk the plan one more time: total watts per circuit under 1,440, no cord longer than it needs to be, no connection sitting in a puddle, and every outdoor outlet on GFCI protection. If any of those fails, fix it on paper first. It’s far easier than fixing it on a ladder in December.
U.S. Consumer Product Safety Commission holiday lighting safety guidance
4. Holiday Lighting Safety Standards Every Large Display Must Meet
Holiday lighting safety standards exist because the failure modes are predictable: overloaded circuits, damaged cords, and wet connections. A large display multiplies every risk, so the safety basics matter more, not less.
GFCI Outlets, Fused Plugs, and Fire Prevention Basics
GFCI outlets are receptacles that cut power the instant they detect a ground fault, and they’re required outdoors by the National Electrical Code. Plug every outdoor strand into one. If your exterior outlets aren’t GFCI-protected, have an electrician convert them before the season starts.
Fused plugs sit at the male end of a strand and blow before the wire does. Check that every strand has one, and replace a blown fuse with the same amperage, never a higher one.
Fire prevention comes down to three habits: keep connections off the ground, never run cords under rugs or through doorways, and inspect every strand for cracked insulation before it goes up. A single damaged strand can compromise an entire run.
National Fire Protection Association electrical safety resources
If you’re not comfortable working on a ladder near power lines or a service mast, call a licensed professional. The cost of an installation is almost always less than the cost of a fall.
5. LED Holiday Lighting Efficiency Saves Money and Expands What You Can Build
LED holiday lighting efficiency is the reason large displays are even feasible today. LEDs use a fraction of the power of incandescent bulbs, run cool to the touch, and last for tens of thousands of hours. That combination changes what you can build.
Here’s the practical payoff. Because LEDs draw so little, you can run more strands on a single circuit, which means fewer extension cords, fewer tripped breakers, and less planning around your home’s electrical panel. You can also leave the display on longer without watching the meter.
Color temperature matters too. Warm white (around 2700K) reads traditional and elegant against brick and stone. Cool white (around 5000K) reads crisp and modern against stucco and glass. Pick one and stay consistent across the property. Mixing them across a large facade is the fastest way to make an expensive display look cheap.
LEDs don’t just save energy. They let you light more of the property on the same circuit, which is what makes a whole-home display possible without an electrical upgrade.
Smart Automation and Weatherproofing: The Details That Separate Pro Displays From Amateur Ones
Two things separate a display that looks professional from one that just looks busy: smart automation and weatherproofing. Both are cheap to add and expensive to skip.
Smart automation means timers and smart plugs that turn the display on at dusk and off at a set hour. You can group zones, dim the display, and control it from your phone. No more crawling behind the shrubs to unplug a strand at 11 p.m.
Weatherproofing means every outdoor connection is rated for wet locations, every plug is elevated off the ground, and every connection point is wrapped or housed in a weatherproof box. Look for an IP rating on the product. IP65 or higher handles rain and spray. IP44 handles splashes only.
The Gulf Coast climate is brutal on holiday lighting. Humidity, salt air, and sudden storms corrode cheap connections fast. Professional-grade hardware and proper weatherproofing are what let a display survive from Thanksgiving through New Year’s without a mid-season repair call.
U.S. Department of Energy LED lighting information
Conclusion: Bring It All Together for a Display That Lasts
The gap between a display that looks impressive in photos and one that actually holds up through the season comes down to planning, hardware, power math, safety, and weatherproofing. Most homeowners get one or two right and skip the rest.
That’s the work Houston Light handles every season. We bring 15 years of experience, the latest LED technology, custom outdoor lighting design, and a lifetime warranty on all lighting we install, backed by insured labor and free on-site commercial consultations. We also handle the extras that finish a display: custom wreaths, garland, and oversized ornaments for residential, commercial, and HOA properties.
Get started with Houston Light and a display that looks as good in January as it did on day one. Request your free estimate today.
Frequently Asked Questions
What safety precautions are necessary for large-scale holiday lighting?
Large displays need GFCI-protected outlets on every exterior circuit, fused plugs to prevent overloads, and a power load calculation before you connect anything. Keep total wattage under 80% of each circuit’s capacity. Use only outdoor-rated extension cords and connections with a proper IP rating. Never daisy-chain more than the manufacturer allows, and inspect every strand for damage before hanging. These steps are the core of holiday lighting safety standards and prevent the most common causes of electrical fires.
How do professionals secure holiday lights to rooflines without damage?
Pros use roofline clips and gutter hooks instead of nails, staples, or adhesive. These clips snap onto shingles, gutters, or fascia and hold strands firmly without piercing roofing material or paint. For large home holiday lighting, clips also let you space strands evenly and remove everything quickly after the season. This approach protects your roof warranty and avoids the repair costs that come from drilling or stapling into trim.
How many feet of lights does a large house need?
Measure every run you plan to light, rooflines, gutters, windows, trees, and walkways, then add 10-15% for slack and connections. A typical two-story home with full roofline coverage often needs 200 to 400 feet of strands, but large facades with multiple gables can exceed that. Buying based on measured runs rather than guesswork prevents mid-installation shortages and keeps spacing consistent across the entire display.
Is professional holiday lighting installation worth it for a large home?
For large or multi-story homes, professional holiday lighting installation solves the hardest problems: ladder safety at height, correct circuit load distribution, weatherproof connections, and even spacing across long runs. It also includes insured labor and often a warranty on the work. If your display involves steep rooflines, tall trees, or commercial-grade fixtures, the safety and reliability gains usually outweigh doing it yourself.